Building a Segmentation Model in Tensorflow
- Uri Merhav
- Nov 21, 2018
- 2 min read
Updated: Nov 24, 2019
One of Hoss' platforms, Product Pix, performs advanced image segmentation to separate the object of a picture from its background. This post will be a shallow dive into that model, serving as an introduction into how to something basic off the ground. See our previous post on building a tensorflow pipeline to get started, and then keep reading!
Removing Background From Product Pictures
The concept is simple: E-sellers need to take photos of products, and then have to do a laborious task of removing the background pixels (which is quite tedious!). Why not do that automatically?

But getting labeled images of products with and without background is very tricky. So: data generator to the rescue! Here’s what I ended up doing:
Search images in the public domain where only an object is present (there’s actually a ton of those — transparent png files are all over the place).
Search Bing Images for some generic background templates like “carpet” or “wall”.
Build a generator that generates pairs of backgrounds file path + object field path, melds them together.
Task the model with guessing which pixels belong to the background and which ones to the object (and a bunch of other things, but that’s another post).
So all told we have a bunch of backgrounds like these:


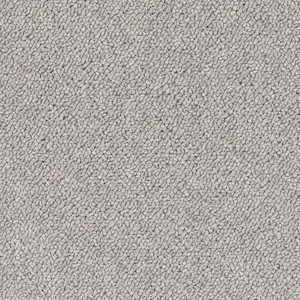

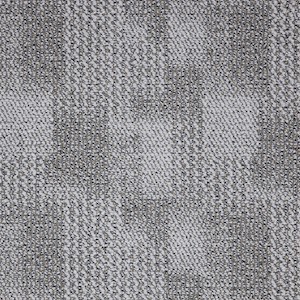
Bunch of backgrounds
And we merge them with product photos that have no background
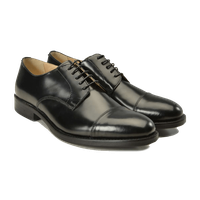


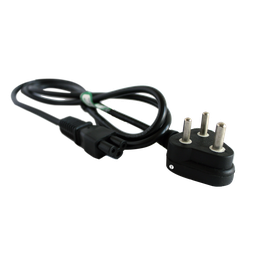
Random product photos
There’s a bunch of small problems to solve here. For example, the backgrounds are usually much bigger than the product photo, so we need to crop the background photo to the product size, and then merge the two photos. The entire pipeline is a tad complicated as it wasn’t written with a tutorial in mind, but I’ll put the highlight snippets here. We have a generator that yields background path + product path.
We load the background as an RGB image, and the object png actually has both an RGB image and what we call a transparency map (which we call object_pixels: it tells us which pixels belong to the background and which belong to the object). Then inside our dataset.map operation, we crop a random piece of background, and blend it with the foreground.
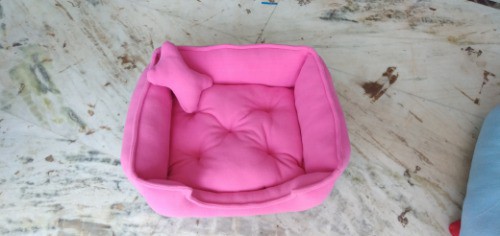
The results are pretty neat — sometimes. Here’s one before/after pic I rather like, though it’s still not 100% perfect:

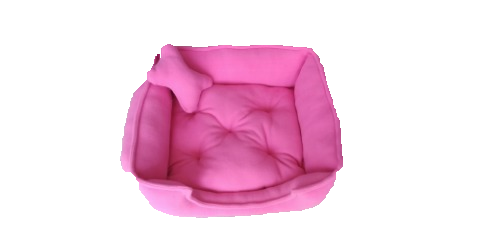

You can play around with the model on the site here, but be forewarned — this basically only works on pictures that resemble real product photos. Anything else, it’s garbage in — garbage out!


Comments